This Street Corn Ravioli is a deliciously decadent meal that rivals the flavors of a gourmet restaurant. Maybe that’s because it was inspired by a dish I had recently when me and my husband were out on date night in downtown Los Angeles.
The restaurant we went to is known for combining Mexican and Italian cuisine in a really interesting way. I had a dish called the Street Corn Agnolotti and I fell in love with it! I was determined to try and recreate it at home.
Here’s a picture of the original dish I had at the restaurant:

Agnolotti is a stuffed pasta very similar to ravioli. However, agnolotti is smaller and typically made by hand and we don’t time for all that! My Street Corn Ravioli recipe is kept simple by using refrigerated ravioli that cooks in minutes. The sauce is also easy and comes together with just a handful of ingredients. The most time consuming part is waiting for your corn to roast, but the rest couldn’t be any easier!
WHAT IS MEXICAN STREET CORN?
Mexican street corn, also known as elote, is a popular and delicious treat that’s commonly sold by street vendors in Mexico. It consists of grilled or roasted corn on the cob that’s typically slathered with a mixture of mayonnaise, crema (Mexican sour cream), or yogurt, then sprinkled with cotija cheese, chili powder, and freshly squeezed lime juice. Sometimes chopped cilantro or parsley is added for extra flavor.
The combination of creamy, tangy, and savory flavors with the sweetness of the corn makes it a favorite street food. It’s often served on a stick or in a cup. I travel to Mexico frequently because that’s where my husband was born. We often visit family there and every time we go, I have to get some elote. I love the flavors in it and this recipe mimics those flavors perfectly.
HOW TO ROAST THE CORN
Grilled or roasted corn on the cob work best in this recipe. There are a couple different ways you could do this, but I’ll share with you my preferred method, which is roasting the corn in the oven:

- Turn the oven to 350 degrees.
- Remove husks from corn and wrap each one tightly in aluminum foil.
- Place them on a baking sheet and cook for 20 minutes.
- Turn each one over and cook for another 20 minutes.
- Remove the baking sheet from the oven and open each one carefully, pulling back the aluminum foil so the corn is exposed. Move the rack to the very top, turn the broiler on high and cook for two minutes. Check on it and see how roasted it is. You want the corn to be a dark brown color. If needed, roast another minute or two.
- Once part of the corn is roasted and has a nice char, remove it from the oven and let it cool.
- Once cooled, use a sharp knife to cut off the kernels and put them in a bowl. Place corn to the side until ready to use.

INGREDIENTS
- Ravioli – Refrigerated or frozen ravioli both work. I’m using refrigerated in my recipe today.
- Roasted corn – This recipe uses four ears of corn, which comes out to roughly two cups. This doesn’t have to be measured perfectly, but you want about 1½ cups of corn to blend for the sauce and another ½ cup to fold into the pasta at the end.
- Butter – Adds richness to the sauce.
- Heavy cream – Adds creaminess to the sauce.
- Salt
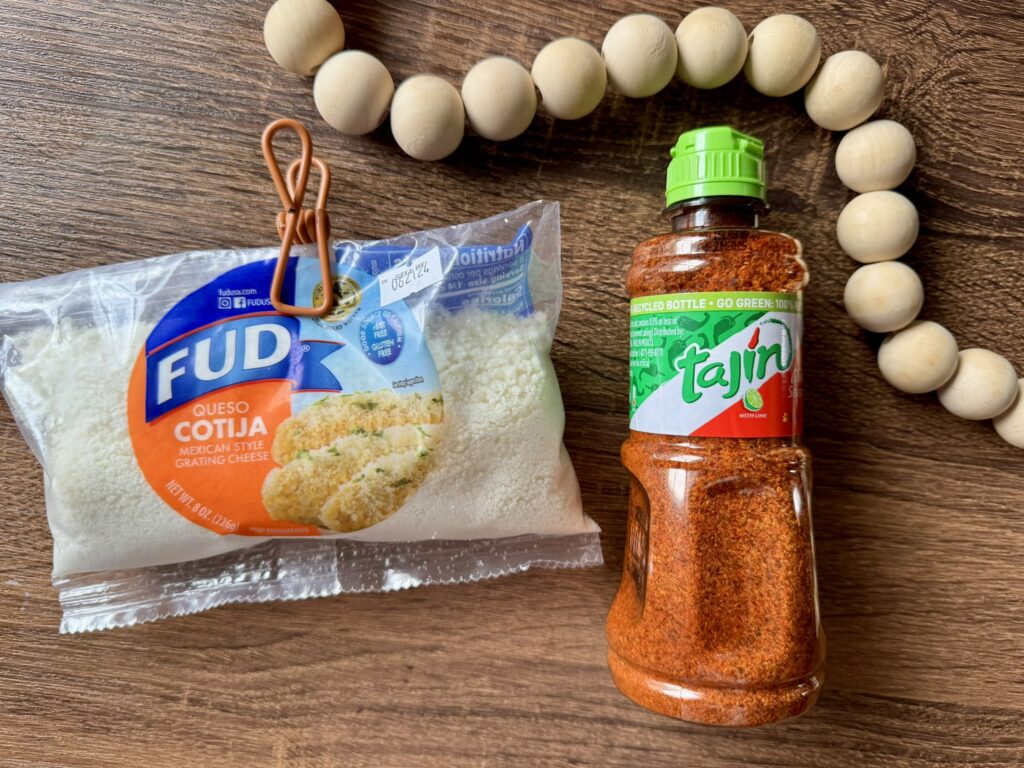
- Cotija cheese – a Mexican cheese that street corn is commonly topped with. You can get the kind that is pre-grated or you can get a block of it and crumble it yourself.
- Tajin seasoning – a popular Mexican seasoning blend made of ground chili peppers, salt, and dehydrated lime juice. It’s the finishing touch on this dish!
VIDEO INSTRUCTIONS
STEP-BY-STEP INSTRUCTIONS
1. First, make sure your corn is roasted and ready to go. (Instructions for how I like to roast corn are above. Just scroll up!)
2. In a large pot, cook the ravioli according to the package, which is typically between 3-5 minutes for refrigerated ravioli. Once it’s done, drain and set aside.
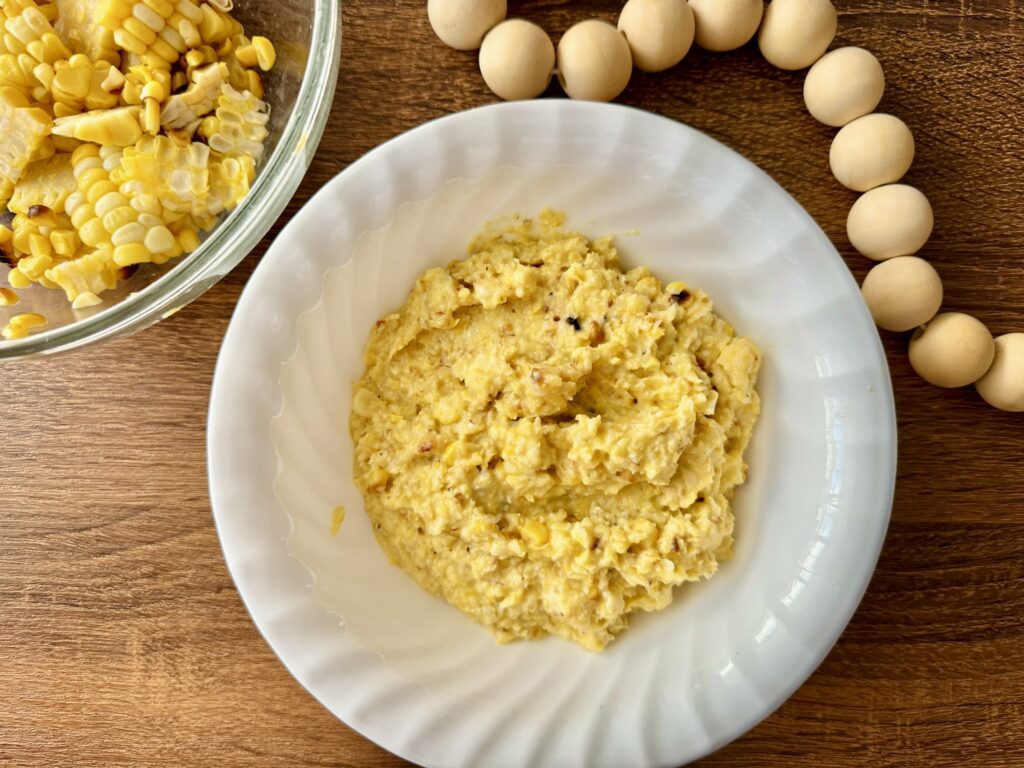
3. While the tortellini cooks, add about 1½ cups of the roasted corn to a blender and pulse until the corn is mostly blended. (Save about ½ cup of the corn to fold in at the end.) If the corn mixture is getting stuck, just stir between pulsing and add 1-2 tablespoons of water to help. If doesn’t need to be completely smooth, but it should get down to the consistency of a thick paste. (Pictured below.)
4. Add the butter to the same pot you used to cook the ravioli and turn heat to medium. Once it’s mostly melted, add the blended corn mixture. Stir well.
5. Add the cream and turn heat to low. Stir consistently for about a minute.
6. Once all the sauce ingredients are mixed well, add the cooked tortellini and extra corn to the pot and gently fold into the sauce.
7. Serve it topped with generous amounts of Cotija cheese and Tajin. Enjoy!

TIPS & NOTES
To save time, you can always roast the corn the day before. Just wrap the cooked corn on the cob in aluminum foil, or cut off the cooked kernels and store them in an airtight container in the refrigerator.
If the corn gets stuck when you blend it, just scrape the sides of the blender a couple times and stir. You can also add 1-2 tablespoons of water to help.
This dish makes great leftovers. Just keep them in an airtight container and it will last for 3-4 days in the refrigerator.
Street Corn Ravioli
Ingredients
- 18 oz bag ravioli
- 4 ears corn (about 2 cups)
- 4 tbsp butter
- ½ cup heavy cream
- ½ tsp salt
- Cotija cheese for topping
- Tajin seasoning for topping
Instructions
Roast the Corn:
- Turn oven to 350°. Leave husks on the corn and just cut off the strings at the end, if any, and lay on a baking sheet. (If husks look dirty, you can always remove one or two but leave the remaining husks on.)

- Cook for 20 minutes on one side, and then carefully flip each ear. Cook another 20 minutes on the other side.
- Once done, remove corn from the oven and carefully remove the husks. They should come off very easily, but the corn will be hot.
- Lay the corn back on the baking sheet.
- Move oven rack to the top and turn broiler to high.
- Put corn in and cook for two minutes.
- Flip each ear a little and cook another 1-2 minutes. (Be sure to keep an eye on the corn while the broiler is on since some ovens are hotter than others and might be done sooner.) Once they have a good char on part of the sides, remove from the oven.
- Let the corn cool off a bit and then carefully cut off the kernels lengthwise from the corn. Place in a bowl and set aside.
Put it Together:
- In a large pot, cook the ravioli according to the package, which is typically between 3-5 minutes. Once it's done, drain and set aside.
- While the tortellini cooks, add about 1½ cups of roasted corn to a blender and pulse until the corn is mostly blended. (Save about ½ cup of the corn to fold in at the end.) If needed, add 1-2 tablespoons of water to help it blend more smoothly.
- Add the butter to the same pot you used to cook the ravioli and turn heat to medium. Once it's mostly melted, add the blended corn mixture. Stir well.
- Add the cream and turn heat to low. Stir consistently for about a minute.
- Add the cooked tortellini and extra corn to the pot, and gently fold into the sauce.

- Serve it topped with generous amounts of Cotija cheese and Tajin. Enjoy!
If you give this a try, let me know how you liked it by giving it a quick rating below! I appreciate it so much.
<3 Meghan | Electric Mommy


